Thursday, September 18, 2014

Beginning a New Project: Basement Home Office

We've officially been in our "new" home for 7 months now. Wow, time flies, eh?

When we hit our 6 month anniversary, I had planned to get a "6 months in" progress review written. The plan was that I would take current pictures of all the rooms in the house and do a before/after comparison. However, that would mean cleaning my house from top to bottom in order to get those photos. And unless we're having company over, that's a near impossible task these days.

So...in order to procrastinate further on the progress review, we're going to make strides in the actual progress department. This post kicks off the beginning of the basement home office project. Yay!


I'm hoping that this is one space that we can stick to until completion. I know I've mentioned in that past that we are completely ADD do-it-yourselfers. We still have yet to finish the girls room, make additional improvements to our bedroom, finish the half bath, finish the entryway makeover, and now we're throwing the basement office space into the mix too. There is also no doubt that we will start on the boys shared bedroom sooner than later, too. If I were to give advice to anyone, I'd say, "pick one space and focus on that until it's done." But I can't follow that advice myself, so here we are!

Considering that my commute is often taking me an average of two hours just one way lately, I'm going to try to work at home more often. It's amazing how much more productive you can be when you pull 4 hours of driving out of your schedule. With that in mind, we decided to make the "home office" a little more inviting.

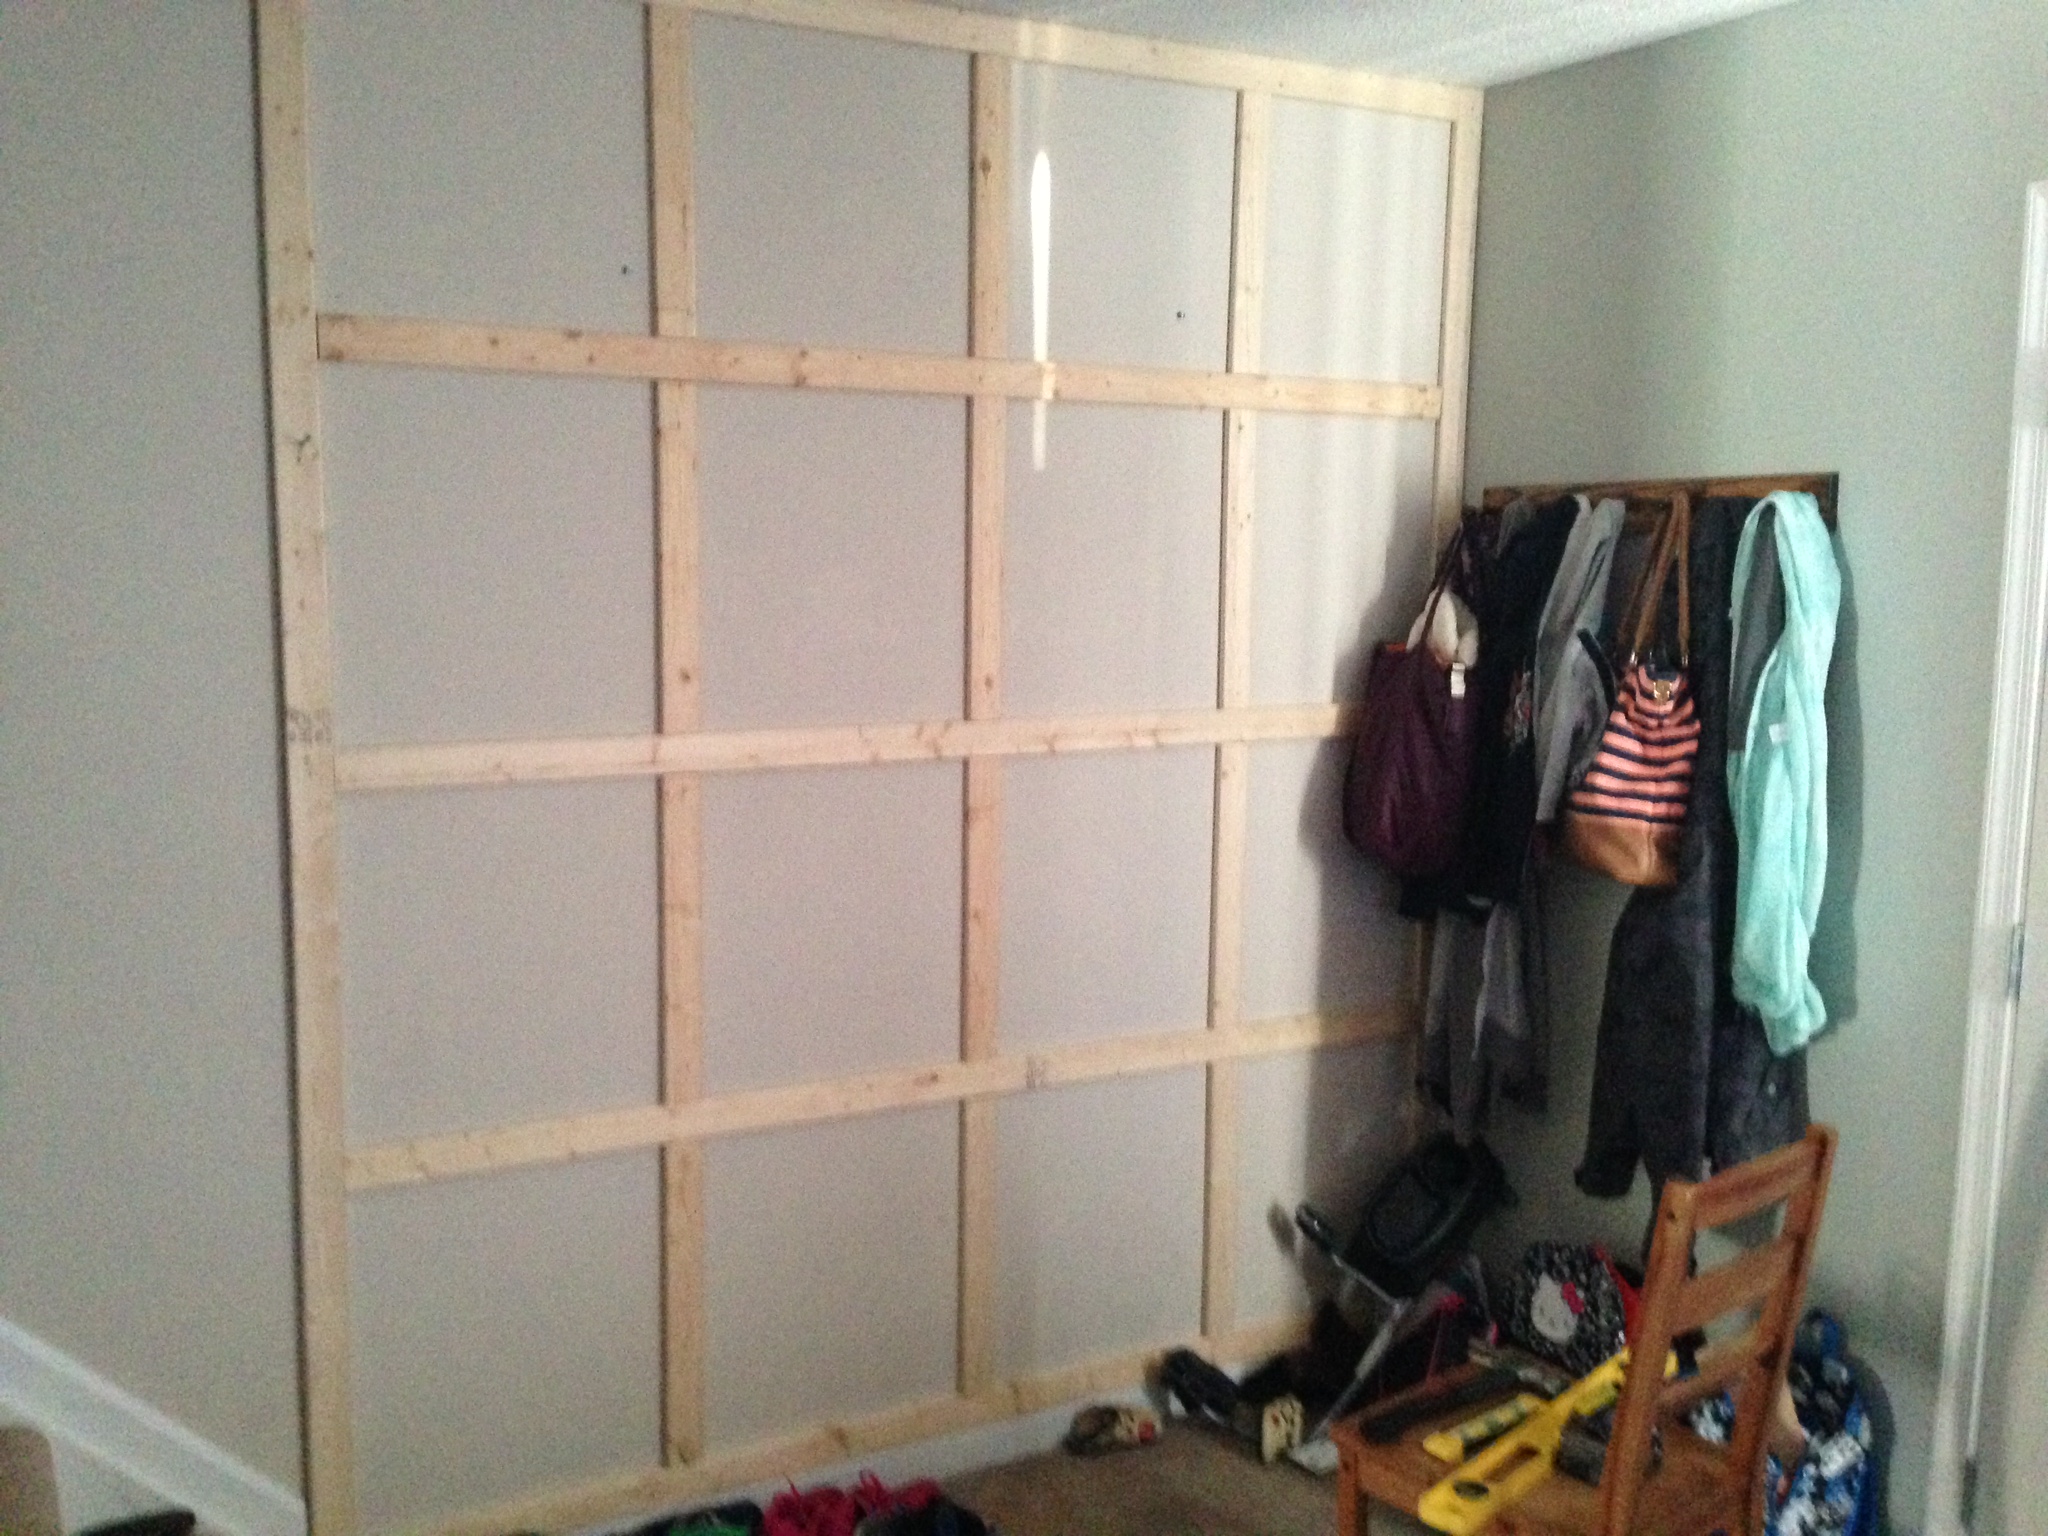
This space previously consisted of my craft desk and a whole bunch of clutter stuffed into the back corner of the basement. It was totally overrun by toys and just plain stuff that hasn't found a home since our move. (Yea, 7 months and we're still working on unpacking. Oi.)


I wanted to take a good "before" picture of the space so that you could see this whole wall that would eventually become the wall-to-wall desk. But instead, I captured my husband's annoyed, "just take the picture already" look.

A few years ago, Justin made me this Ikea Expedit Hack Craft Desk. We took two Expedits, affixed a top to it with 3 10x1 boards, and applied a little paint.


It got a lot of use when I used to have more time to sew. Now, it just hold my two monitors and some other stuff.

We are huge fans of reusing stuff where we can, so we came up with this plan:


This "plan" includes a wall to wall desk using a few boards from the old craft desk, and floating shelves for storage.

If you follow on Facebook, you saw our "teaser" the other weekend as we were working on staining the desk top.


What we've done so far to the space has been really easy. We stained the boards with Minwax American Walnut, and used a Kreg Jig in order to piece all of the boards together seamlessly. For now, the boards are sitting on top of the two Expedit shelves.


We will eventually push the Expedit cubes fully to each side (right and left) and build a cabinet in the middle. By placing a cabinet right in the middle, it will provide the desk top with additional stability and help to define two separate work stations; one for computer work, and one for sewing/crafts.

Next though, we need to sand some walls and get painting!


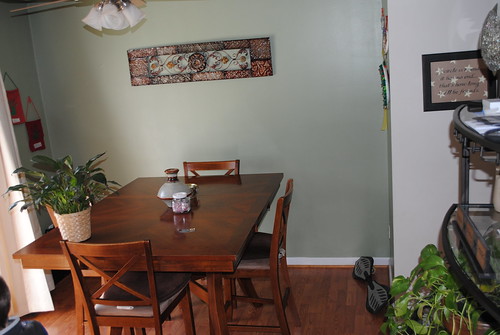
I have picked out Valspar's "Sparkling Lake" and love the way it looks against the stained wood!


That's all I have for today. I hope to have another update for you on this space next week. No promises though. We may or may not have already started demoing our master bath too...

I can't be the only one out there with a million projects going, right?!


Friday, September 5, 2014

White Ektorp Slipcover Debacle: An Ikea Slipcover Tradegy

My white Ikea Ektorp slipcover. I bought it, I loved it, and then I washed it....

A while ago, I wrote this post about how it was wearing and swore to post an update after it's first wash.Well, here we go!


After we moved into this house, I knew immediately that I wanted a white slipcover for our couch. In fact, even when we lived in our old house in Annapolis, I put this mood board together hoping to convince my husband that we should get the white slipcover for our Ikea Extorp sectional. No dice.


But when we moved into this place, we got a gift card at closing from our bank. I guess when you plan to spend hundreds of thousands of dollars over the life of a loan in interest alone, the bank decides to give you $200 back as a "thank you" gift. So I took that as an opportunity to spend $99 of it on my coveted slipcover.


It has made it through its first wash and now looks like this:


I could cry. (And not because there are little feet injuring tiny toys sprinkled all over the floor. Darn My Little Pony jewels!) Despite following the washing directions, our white slipcover looks like someone attempted to tie-dye it yellow. What. In. The. World. Happened?!

I've tried bleaching it. No luck. I've tried washing it and putting it out to dry in the blinding sun. No luck. So, in short, my review is simple: I am NOT happy. I followed the washing instructions and my lovely white slipcover is ruined. Poop.

And now Justin says it is so ugly that we can't put it back on the couch. I'm stuck with Old Blue once again...


Many years ago, Old Blue once was part of a Pottery Barn wunnabe mood board, but it's a little past it's prime now. I don't like it as much in this room, and especially not with my new Ikat pillows and paint color.


Old Blue once looked like this in all its glory:


Old Blue even had this mood board created around it:


But Old Blue just looks too old and worn now, and it is just not cutting it.

Does anyone have any tricks up their sleeve in regards to saving my favorite white cover? Or should we just scrap the idea of ever having a white couch and dye the ruined white cover another color? Navy? Gray? Let me know what you think!!

Wednesday, September 3, 2014

Grid Style Board and Batten Entryway and Drop Zone

In an effort to get ahead of the back to school clutter, we had to implement something other than our puny little coat rack in order to tame the mess. After a lot of Pinspiration (that's a thing, right?) I drew up a plan in my handy notebook that resulted in this:


Hear the angel's singing? It's beautiful. I swear, I should rename this blog "My Husband Made It", because he takes my crazy ideas and turns them into awesomeness like this.

Here is the progression of this little space.


This was a totally bare space when we moved in. In fact, when we first toured this house, the tenants of the previous owner kept guinea pigs and cages in this corner. We have a little closet in the family room, but we knew that there was no way that this little corner wouldn't get cluttered up with coats, shoes and backpacks. With fours kids, I would spend my entire life hanging coats in the closet, and "ain't nobody got time for  that."

We originally hung up a cute little coat hook that my father-in-law made. It's cute, but it just wasn't quite enough to tame the whirlwind of stuff that kept getting deposited here.

Next, we intend to build a long bench to go here to complete the space. Maybe we'll hang some key hooks on the short wall. I just can't wait to put another item on the "honey do build" list.


In order to build out our awesome grid style board and batten wall, we started by affixing furring strips horizontally to the wall.


The horizontal strips were screwed into the studs and vertical pieces were cut to size and affixed with liquid nails.


Once everything was up, we caulked...


puttied....


 and sanded.

Here's where I have to note that if we were to do this project over again, we would have upgraded the wood to a true 1x3 pine or MDF. We spent a lot more money on a large quantity of wood putty and sand paper. Furring strips are really rough and therefore required a ton of patience and sanding in order to get smooth strips and seamless joints.

All in all, I am ecstatic with the results. And so far, it has helped to contain the clutter! The low placement of the hooks has provided an accessible way for the kids to take over picking up their own stuff. That makes one happy mamma!


Tell me, what kind of organization projects have you tackled in preparation for the new school year?


Monday, August 25, 2014

A Whole Lot of Random

My, oh my! It sure has been busy around here...

Between the total craziness at my day job and getting the kids/house ready to go back to school, I feel like it's been pure chaos around here. There are just not enough hours in the day, or enough days in the week. Can we just make weekends a little bit longer? That would help out a ton!

I didn't get a post out last week due to all the chaos, so today's includes a number of random things we've been up to lately. And a lot of grainy iPhone pictures.

As I mentioned, we have been getting the kids and house ready for back to school. The kids are actually back in school as of today! And in an effort to get ahead of the clutter that's sure to come with the kids back in school, we have been tackling a few projects to prep for the mess. First on that list: Creating a pretty and functional drop zone wall in our entryway!


We finished the wall just in time. Although, this picture shows a work still in progress, I plan to "reveal" the space later this week. While this project was in the works, there was even MORE clutter than usual. Isn't that the way it usually goes? Tear one space apart until you finish your project and can manage to put it back together?

We have added some hooks to the wall in accessible heights for the littles. The plan is that this wall will provide a space in which they can hang up their own back packs and coats. Every little bit that the kiddos can contribute to a cleaner and more organized home is extremely helpful.

We're also in the progress of power washing the side of the house. I'm always amazed at the amount of grime that gets washed away by the power washer. Too bad we can only reach a certain height without a ladder. That might be something that we want to invest in sometime... In the meantime, you can see the point at which we just can't reach any higher!


In the meantime, we're also power-washing the fence. I'm trying to convince the hubs that we should also seal the fence with some sort of decking sealer. Have you ever tried to power-wash and seal your fence? I'm totally open to suggestions.

Also on the fence topic, we put up some galvanized steel wire to keep the dog in the fence. Sadie, the dog, thought that it was 100% acceptable to do her business in the neighbor's yard and then take a leisurely jaunt across the street to visit the other neighbors. No one was amused by this, accept Sadie, of course.


Last, but by no means least, we also celebrated a very special 6th birthday!


Our beautiful Skylar is now 6 and is now officially a first grader. Where does time go? It feels like no time at all has passed since she was a baby. We've really enjoyed watching her grow up to be such an adventurous little girl. If there's ever an activity that one of the kids is hesitant about trying, Skylar is always the first to jump right in. Riding bikes, racing down hills, you name it, she's a total daredevil.


With every spare moment we have had lately, we've tried to soak up every little last bit of summer.


With lots of bike riding.


Playing outside and walks to the park.


And even a trip to Knoebel's Amusement park with friends!


Summer vacation is officially over, but we had a blast! On to another new chapter of our lives :)


Friday, August 8, 2014

Inspiring Shutter Project Round-Up

Recently, Hometalk asked me to curate a board of shutter related projects. I had a blast browsing the site to find some inspirational projects. Having done our own shutter makeovers, I forgot that there are so many creative things that you can do with shutters, including making your own!

If you are not familiar with Hometalk, it is a site where you can browse home and garden projects, share your own, or even post questions to the community. It's a great place to find inspiration on a variety of things; home decor, home improvement, landscaping, you name it. If it's a topic related to your home, you'll find it there. But I warn you, it's a lot like Pinterest in the sense that it will suck you in. Before you know it, you'll find yourself having spent hours browsing.

Click on the graphic below to check out my roundup of adorable shutter related projects on Hometalk!

http://www.hometalk.com/b/2158107/collection-of-inspiring-shutter-projects

I just love the idea of using an old pair of wood shutters for a headboard, or using a whole wall of them to add visual interest to a room. So. Many. Ideas.

Take a look and tell me which one is your favorite!

Wednesday, August 6, 2014

Kitchen Paint Color Selected: Kitchen Painted

I thank you all for your input into our kitchen color selection process. It turns out that Tranquility was the winner by popular vote! However, we picked Pirate Coast in the end.


This room probably gets the most light in the house, so we could have gone with a slightly darker shade, but I wanted this room to be as bright as possible.We might bring in some darker color down the road if/when we decide to either repaint or refinish the cabinets.


Isn't is lovely?

Excuse the fact that the table and chairs are shifted slightly to the right of the rug and look like they are about to fall off the edge. Kids. I'll blame it on the kids. People should hire them to move furniture, because they do a great job! And I totally didn't catch the lopsidedness until now...


I can't wait until we get around the stage in our kitchen re-do when we get to rip our the backsplash. And replace counters. And swap out appliances. And replace that microwave hood that no longer works, causing a "ceiling tan" on the drywall above the stove. Yum.


But look at that beautiful DIY island!

And for comparison sake, this was a picture of the kitchen on move in day. Excuse Oaken's big head and the blurry iPhone pic. Look at those dark green walls!


When we first put the new paint on the walls, we kept thinking...It's white. Like almost completely white. In comparison to the dark green, it felt completely devoid of color. And, for a little while, I regretted our decision. However, after a few coats of the new color, we decided we really really liked it. It's amazing how much bigger the kitchen feels now! It's a much happier color and so much more "us". Yay!


Next on the kitchen list is to do something with that big blank wall behind the table. Plank wall? Big black and white photos? A banquette bench? The wheels are churning!


Wednesday, July 30, 2014

supercalifragilistic-EXPEDIT-alidocious: Our plans for an Expedit Changing Table

A crazy post name to accompany another "should have been super easy" type project!

Okay, first of all... Whose GREAT idea was it to discontinue the Expedit? I get that Ikea is trying to reduce it's footprint with all of its wood consumption, blah, blah, blah, but c'mon. We all know it's a ploy to produce a cheaper, but similar product with the new Kallax series. (Here's the link to Gizmodo's article explaining the change.) I'm being a little dramatic, but I want the Expedit back! And by the way, Ikea, you might want to actually want to have the Kallax in stock before you completely sell out of the Expedit. Just a thought.

I guess I should provide a little background here. A while ago, I explained that one of the items on my to-do list was to create a changing station for baby Cullen. Because we cloth diaper, I wanted an area with quick access to the potty when he gets a little older. (You know, for diaper spraying and whatnot.) We're trying to make cloth diapering as easy on ourselves as possible.

Cullen at 12 weeks old in his Albert print BumGenius Diaper

Justin (hubs) and I though that we would incorporate a sturdy floating shelf in the corner of the bathroom to hold a changing pad with all of the additional paraphernalia below. We even went to Lowe's and purchased all of the supplies. After getting home to begin our little project, we discovered it was going to be at the perfect height for one of our little people to bump their heads on. We spend enough time at the doctor's office with boo boos, and we'd like to avoid any more opportunities for disaster.

After realizing our initial plan was a complete failure, I remembered this post from Young House Love. (I totally wish we could be John and Sherry by the way!) Justin has to remind me constantly that we're not, and we can't do everything they do. Buuuuuut, in this case, we could totally steal a little page from their changing table book. We absolutely don't have the space for something as big as theirs, but I just happened to have the smaller 4-cube Expedit chillin in my closet. I threw all of the clothes out of it and lugged it downstairs.


It fits! It's perfect actually, except for the color...

Which brings me back to my rant. The Expedit has been discontinued by Ikea, and I just so happened to grab the last white one at our College Park store. I should have known better. Not only was is damaged, but was lacking the hardware as well. I drove the hour back to Ikea, got a discount since it was the last one, and picked up a baggie of hardware. Once home, we realized that this hardware must be the stuff for the new Kallax series because the screws were absolutely not long enough.

At this rate, I will never get my pretty white Expedit changing station. And in the meantime, my closet is a total mess with my clothes missing their nice organized home. Here's hoping we figure something out soon!

Tell me, how many of you are heartbroken by the demise of the Expedit? And what kind of non-changing table, changing stations have you come up with?

Wednesday, July 23, 2014

Kitchen Color Choices

For some reason, the decision making process to pick a new color of paint in the kitchen has been a tough one. Like, ridiculously tough. Like, no one should ever spend so much stinking time blocking the aisle in front of the paint chips at Lowe's, tough. And with four kids, you KNOW we're blocking the entire aisle as I stand there thinking about paint.

My husband has just about abandoned me at Lowe's for the amount of time that I spend deliberating over paint chips.

Here's how almost every weekend morning begins in our house:

Justin: "So, what do you want to do today?"

Kira: "Oh, I don't know. Do you want to get some stuff done around the house?"

Justin: "Yea, sure. What do you want to get done?"

Kira: "Paint, maybe?"

Justin: "Okay, let's get the kids ready and head to Lowe's. We also need XYZ from there to work on another project"

Kids Groan. They know that they are about to loose 2 hours of their weekend playtime in a Lowe's shopping cart.

When we get to Lowe's, we walk around the store, realize that our other plans to purchase xyz aren't quite in the budget at this time and swing by the paint department. I grab a handful of paint chips, ask Justin what he thinks, we don't agree on a color and we return home only with a handful of paint chips.

This is a picture of the kitchen/dining space prior to move in:


And here's the other side of the kitchen with the island that Justin built:


Though we haven't managed to pick a color yet,we've identified these as possibilities.


Help us out and let us know in the comments section what you think! (Or feel free to add a write-in vote.)


**We received zero compensation to promote Valspar paint. It's just what we always used, and we love it. **

Monday, July 21, 2014

Live and Learn Lesson: Painting Shutters

We have learned a lot of lessons playing this DIY game. Today's lesson: don't trust the paint color matcher at Lowe's, you might be seriously disappointed.

But let's back up a step.

Out initial plan of painting the shutters also included painting the exterior door trim.


As you see I'm the above picture, the door trim and shutters are that funky brown color that totally made the house feel dated. The house was built in 87, but I swear that color made the house look older than it was. And nobody/no thing wants to look older that it is. So we decided to do a little painting.

This is one of those projects that you think should be super easy, in theory, and it ends up with you hanging out a window ready to jump.


J/K on the jumping part, but for real on hanging out the window. Removing the second story shutters without a decent ladder is no joke. Hubby to the rescue again!

Anyways, we started with our usual trip to Lowes to pick out paint colors for its project. We thought it would be super easy if we could spray paint the shutters for an nice even coat. I headed to the paint  chip selection where I remembered seeing chips that said they were available in spray paint. Except, they didn't actually match the spray paint can selection. We picked out a spray paint we liked from the selection of cans instead and headed to the paint counter to see if they could match the color. It was a record quick trip. We left with 4 cans of navy spray paint and a 1/2 quart if exterior satin paint in the "matching" navy color.

Valspar Oceanic Satin

First, we spray painted the shutters. Though Justin had to hang out the window to unscrew them from the house, it wasn't too difficult of a project.


We finished the lower level shutters first, and screwed them back on.


I worked on painting the trim around the front door while Justin worked on the shutters. It was when the shutters went back up that we realized we had a probem... The shutters and the trim are totally different shades of blue. Womp, womp. Lowe's paint color matching fail. Our lesson was learned the hard way that you should probably paint something first, and if possible, bring in that item in order to have Lowe's color match your item. Relying on a peice of spray painted paper just doesn't work.

Reattaching the shutters was by far the worst part of all of this. We even considered renting a tall enough to reach that second story in order to complete our "easy" project. Justin managed successfully, though, to wield the heavy power drill and hold the shutters in the exact matching position that shutters had been in previously in order to reattach them.


Now, we just have to decide whether or not we gamble with another $16 to see if Lowe's can better color match the trim around the door. I thought at first that the slight color difference would drive me nuts, but the longer we live with it, the less noticeable it has become. Has anybody else had any similar experiences? What color matching guidance can you provide?