Wednesday, July 30, 2014

supercalifragilistic-EXPEDIT-alidocious: Our plans for an Expedit Changing Table

A crazy post name to accompany another "should have been super easy" type project!

Okay, first of all... Whose GREAT idea was it to discontinue the Expedit? I get that Ikea is trying to reduce it's footprint with all of its wood consumption, blah, blah, blah, but c'mon. We all know it's a ploy to produce a cheaper, but similar product with the new Kallax series. (Here's the link to Gizmodo's article explaining the change.) I'm being a little dramatic, but I want the Expedit back! And by the way, Ikea, you might want to actually want to have the Kallax in stock before you completely sell out of the Expedit. Just a thought.

I guess I should provide a little background here. A while ago, I explained that one of the items on my to-do list was to create a changing station for baby Cullen. Because we cloth diaper, I wanted an area with quick access to the potty when he gets a little older. (You know, for diaper spraying and whatnot.) We're trying to make cloth diapering as easy on ourselves as possible.

Cullen at 12 weeks old in his Albert print BumGenius Diaper

Justin (hubs) and I though that we would incorporate a sturdy floating shelf in the corner of the bathroom to hold a changing pad with all of the additional paraphernalia below. We even went to Lowe's and purchased all of the supplies. After getting home to begin our little project, we discovered it was going to be at the perfect height for one of our little people to bump their heads on. We spend enough time at the doctor's office with boo boos, and we'd like to avoid any more opportunities for disaster.

After realizing our initial plan was a complete failure, I remembered this post from Young House Love. (I totally wish we could be John and Sherry by the way!) Justin has to remind me constantly that we're not, and we can't do everything they do. Buuuuuut, in this case, we could totally steal a little page from their changing table book. We absolutely don't have the space for something as big as theirs, but I just happened to have the smaller 4-cube Expedit chillin in my closet. I threw all of the clothes out of it and lugged it downstairs.


It fits! It's perfect actually, except for the color...

Which brings me back to my rant. The Expedit has been discontinued by Ikea, and I just so happened to grab the last white one at our College Park store. I should have known better. Not only was is damaged, but was lacking the hardware as well. I drove the hour back to Ikea, got a discount since it was the last one, and picked up a baggie of hardware. Once home, we realized that this hardware must be the stuff for the new Kallax series because the screws were absolutely not long enough.

At this rate, I will never get my pretty white Expedit changing station. And in the meantime, my closet is a total mess with my clothes missing their nice organized home. Here's hoping we figure something out soon!

Tell me, how many of you are heartbroken by the demise of the Expedit? And what kind of non-changing table, changing stations have you come up with?

Wednesday, July 23, 2014

Kitchen Color Choices

For some reason, the decision making process to pick a new color of paint in the kitchen has been a tough one. Like, ridiculously tough. Like, no one should ever spend so much stinking time blocking the aisle in front of the paint chips at Lowe's, tough. And with four kids, you KNOW we're blocking the entire aisle as I stand there thinking about paint.

My husband has just about abandoned me at Lowe's for the amount of time that I spend deliberating over paint chips.

Here's how almost every weekend morning begins in our house:

Justin: "So, what do you want to do today?"

Kira: "Oh, I don't know. Do you want to get some stuff done around the house?"

Justin: "Yea, sure. What do you want to get done?"

Kira: "Paint, maybe?"

Justin: "Okay, let's get the kids ready and head to Lowe's. We also need XYZ from there to work on another project"

Kids Groan. They know that they are about to loose 2 hours of their weekend playtime in a Lowe's shopping cart.

When we get to Lowe's, we walk around the store, realize that our other plans to purchase xyz aren't quite in the budget at this time and swing by the paint department. I grab a handful of paint chips, ask Justin what he thinks, we don't agree on a color and we return home only with a handful of paint chips.

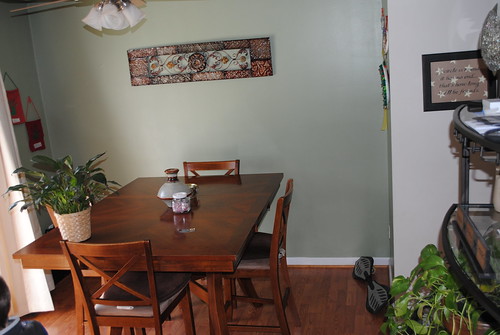
This is a picture of the kitchen/dining space prior to move in:


And here's the other side of the kitchen with the island that Justin built:


Though we haven't managed to pick a color yet,we've identified these as possibilities.


Help us out and let us know in the comments section what you think! (Or feel free to add a write-in vote.)


**We received zero compensation to promote Valspar paint. It's just what we always used, and we love it. **

Monday, July 21, 2014

Live and Learn Lesson: Painting Shutters

We have learned a lot of lessons playing this DIY game. Today's lesson: don't trust the paint color matcher at Lowe's, you might be seriously disappointed.

But let's back up a step.

Out initial plan of painting the shutters also included painting the exterior door trim.


As you see I'm the above picture, the door trim and shutters are that funky brown color that totally made the house feel dated. The house was built in 87, but I swear that color made the house look older than it was. And nobody/no thing wants to look older that it is. So we decided to do a little painting.

This is one of those projects that you think should be super easy, in theory, and it ends up with you hanging out a window ready to jump.


J/K on the jumping part, but for real on hanging out the window. Removing the second story shutters without a decent ladder is no joke. Hubby to the rescue again!

Anyways, we started with our usual trip to Lowes to pick out paint colors for its project. We thought it would be super easy if we could spray paint the shutters for an nice even coat. I headed to the paint  chip selection where I remembered seeing chips that said they were available in spray paint. Except, they didn't actually match the spray paint can selection. We picked out a spray paint we liked from the selection of cans instead and headed to the paint counter to see if they could match the color. It was a record quick trip. We left with 4 cans of navy spray paint and a 1/2 quart if exterior satin paint in the "matching" navy color.

Valspar Oceanic Satin

First, we spray painted the shutters. Though Justin had to hang out the window to unscrew them from the house, it wasn't too difficult of a project.


We finished the lower level shutters first, and screwed them back on.


I worked on painting the trim around the front door while Justin worked on the shutters. It was when the shutters went back up that we realized we had a probem... The shutters and the trim are totally different shades of blue. Womp, womp. Lowe's paint color matching fail. Our lesson was learned the hard way that you should probably paint something first, and if possible, bring in that item in order to have Lowe's color match your item. Relying on a peice of spray painted paper just doesn't work.

Reattaching the shutters was by far the worst part of all of this. We even considered renting a tall enough to reach that second story in order to complete our "easy" project. Justin managed successfully, though, to wield the heavy power drill and hold the shutters in the exact matching position that shutters had been in previously in order to reattach them.


Now, we just have to decide whether or not we gamble with another $16 to see if Lowe's can better color match the trim around the door. I thought at first that the slight color difference would drive me nuts, but the longer we live with it, the less noticeable it has become. Has anybody else had any similar experiences? What color matching guidance can you provide?


Monday, July 14, 2014

Project Curb Appeal: Removing Overgrown Bushes

In our last curb appeal post, we completed a super easy mailbox makeover. Today's project required a lot more manual labor.

Yet again, the hubs took on this project all by himself. He's my hero. Seriously.

Here's what we were working with when we moved in:


Kind dreary in winter, huh?


It's a little less dreary in the summer. And definitely more lively with some adorable kids:


We just were not feeling those giant bushes. So, we decided to rip them out and replace them with some azaleas and other perennials.

The first step in this process was to remove the bushes. Justin took his sawzall to the bushes...


And yuck, things look pretty messy here. Then came digging out the roots which proved to be even more difficult. Justin spent almost a whole day digging those root balls out with a shovel.


But of course Justin got it done and planted new baby azaleas and begonias. We have a little bit of an adorable bunny issue in the neighborhood, so I did a little research and found that begonias are supposedly bunny resistant. We will see!


Awww, so pretty! Thank you to my wonderful husband for all of his hard work.


Now, to address those brown colored shutters and trim :) 

Tell me, what recent curb appeal projects have you been up to?

Wednesday, July 9, 2014

Project Curb Appeal: Easy Mailbox Makeover

The vacation (or staycation) is over. A whole week of relaxation and fun is over and I'm feeling a little grumpy to be back at work this week.

I had all of these plans to be productive and get a lot done last week, including writing a few blog posts, but it just didn't happen. You know what they say about "best laid plans" and all... So here I am today with a project that my husband completed last week during our staycation!

As I outlined in this post, I had hoped to tackle our Curb Appeal. We didn't get everything done that I had hoped to achieve, but we at least got a few outdoor projects checked off the to do list. The first of those projects to improve our home's curb appeal was to improve our mailbox.


It just looked kind of sad, and droopy, and worn.


Now, this will honestly be a short post, there's not much to this simple project. And it didn't cost much either.

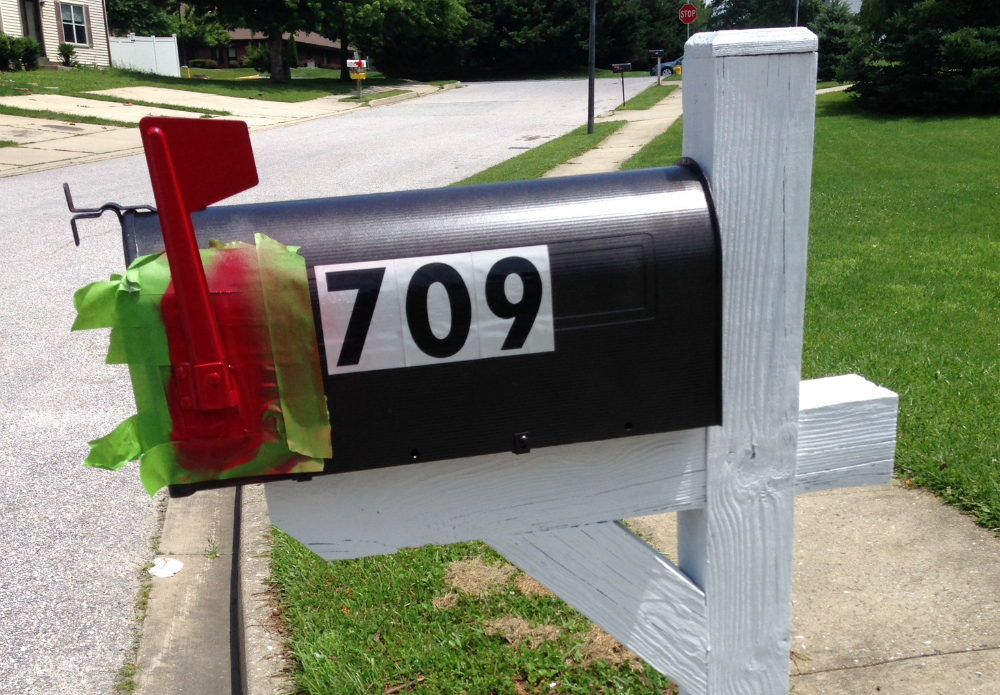
First, we removed the post topper. Then, we simply painted the post with a white interior paint that we already had on hand. The mailbox got a quick spray with our favorite Rustoleum oil rubbed bronze spray paint...

Then the flag got hit with red spray paint.


Voila.


Beautiful!


Okay, so maybe it could use a few flowers or something planted around the base, but you have to admit it's quite an improvement! Tell me, what curb appeal projects have you been up to?