The toilet and paint were both priorities in the half bath. We'll get around to the rest of that to-do list when we have time...eventually!
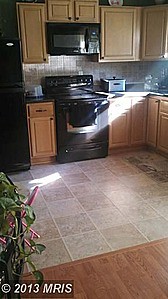
One of the big priorities for the house was to find a way to give ourselves some extra prep space in the kitchen. The kitchen had a big empty space right in the middle that just beckoned an island.
Please excuse the itty bitty picture from the listing. It apparently escaped my mind to take a better "before" picture of this space.
Though I would love to have one of these:
(Stock unfinished base cabinet + beadboard + butcher block countertop = kitchen island)
It's still a work in progress, but we're super happy with the functionality that it's given us so far. All we need to do is give the base a final coat of paint, pick out hardware for the drawer, and give the top one last coat of butcher block sealant.
This project has completely been Justin's baby from the start. (And he has done an awesome job!) All I did was help pick out the stools.
We picked these up at Target for a whole $50 for the pair. SCORE! They might not be super trendy, but they are functional and the seat totally matches the counter top.
The kids are totally obsessed with the stools and the island, giving them another place to hang out and color while we prep dinner. Everyone is happy, happy, happy!!
We think we might eventually swap out the counter for something thicker, but for right now, we are happy that it provides us the additional counter space we desperately needed. Once we have the island 100% complete, I'll be sure to put a more detailed post together about how it was made.
Next: to decide on a shade of paint for the walls in the kitchen!


I really like the information provided in this article and I really like the way you have explained each and everything so well. Very well done with the article, hope that you will continue to do posting
ReplyDelete